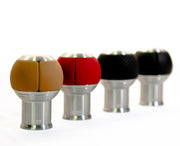
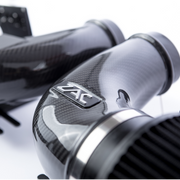
A: Thank you for your custom EZT steering wheel order! Custom wheels have a build time that can range between 3 weeks and 7 weeks depending on core availability and other factors. You can track the exact progress status of your wheel build here.
If you order a Pre-Built steering wheel that is in stock, it will typically ship the next business day.
A: All EZT Carbon Edition Steering Wheels come with a 1 year warranty (from the date of purchase) for defects in materials and workmanship. Warranty does not cover any damage resulting from misuse, improper maintenance or installation, self repair, modifying or tampering.
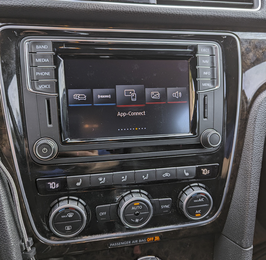
A: No! These radios are easy swaps and can be done by any beginner. You may still hire a professional to install the head unit for you, but rest assured that the swap is not difficult at all. The only tools that are mandatory are a pry tool, as well as a Torx-20 screwdriver. Every head unit comes with a set of installation instructions at no charge. Just add a note on the model and year of your vehicle to your order, or send a message to one of our technicians before completing your purchase.
A: Every OEM Stereo and navigation system we sell will come with a four digit security code. Once the radio is installed in your vehicle and powered on, a prompt will show up on the screen with a numeric keypad. Simply enter the given four digit security code and press OK to unlock the radio.
This only needs to be done one time, when you power on the radio in your vehicle for the first time.
For MIB2 stereos, no radio code is needed. We unlock the unit in-house before shipping to you.
A: If all items are in stock when your order is placed, your order will ship from our facility within one business day. We ship using USPS Priority mail.
Depending on your location from our facility (East Hartford, CT), your shipping duration will depend on the method of shipping you choose in our checkout.
A tracking number will be emailed to you instantly as soon as your order is shipped. All orders above $300 must have an adult present to supply a signature to the deliverer.
Shipments to Canada will arrive in 2-8 business days.
International shipments via DHL will also typically arrive in 2-4 business days.
A: There is now a local pickup option on the site! Select local pickup, then Contact Us to organize a pickup date for your order. We are located in Bloomfield, CT
A: Our full return policy can be seen here.
A: The revision suffix of the RCD510 signifies the features available on that particular unit. For example, AD introduces HD Radio, AE introduces Bluetooth phone control and HD radio album art, and F introduces rear view camera compatibility. Click the link below for more in depth information.
RCD510 Overview- Eurozone Tuning Blog
A: The revision suffix of the RNS510 signifies the features available on that particular unit. The C Revision introduces a stronger LCD Backlit Display, the E Revision Introduces Sirius Travel Link (Live Sports scores, fuel prices, etc). The J Revision introduces a Solid State Hard Drive. Click the link below for more in depth information.
RNS510 Overview- Eurozone Tuning Blog
All RNS510's we sell come with 11M (2016) North America Maps Pre-loaded by us before being shipped. The software which your unit will come loaded depends on the revision of the RNS510. Use the table below to determine which software your RNS510 will come loaded with.
Video in Motion is optional and can be programmed into your RNS510 if requested.
A: In the header of each of the sections of the site, a fitment chart is given for each model and year. If the radio meets the fitment criteria, then the radio will not need any additional hardware for it to power on in your vehicle.
To access each additional feature of your radio may require additional accessories. Follow the chart below as a rule of thumb for each model year and radio. Feel free to ask us any fitment questions in the "Contact Us" section of the page and one of our technicians would be welcome to personally answer any fitment questions you may have.
A: Everything needed for an RNS510 swap, minus a bluetooth module since the MIB2 PQ has bluetooth built in. If your vehicle did not come from the factory with an OEM Microphone, you will need one as well.
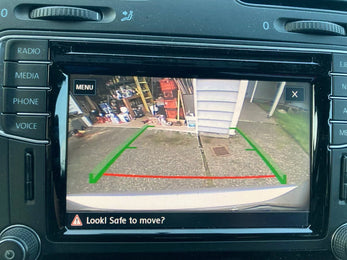
A: All RNS510 and RNS315 Navigation Systems have 26-pin Rear View Camera inputs which can accommodate any OEM Rear View Camera. Only RCD510 Revision F and H models have Rear View Camera inputs. On the RCD510's, you can tell this by the last digit of its part number, or by its visible yellow rectangular 26-pin input on the rear of the unit.
For MIB
A: No! The install is completely plug and play and no programming or radio codes are needed for the swap. Some warning lights may appear after installing (DCC error, lane assist error), but those will disappear after a few cycles.
If you are installing a full MIB2 or MIB2.5 Kit into your 2015 vehicle with Fender Audio, then some programming is needed. See page 3 of our guide here. Otherwise, the installation is plug and play.
A: Check out our camera install troubleshooting guide linked here.
Most issues can be attributed to a wiring issue (one of the wires in our kit not connected properly or securely), power issue, or programming issue.
Additional Tips: